Logo & Files
1.1.2. Logo and Files
Path: Organizations>Edit Organization
The logo is crucial in the professional world as it helps distinguish the organization from others and gives it a unique identity.
1.1.2.1. Organization Logo
Path: Organizations>Edit Organization>Logo and Files
The organization's logo helps users be recognized and have their own identity. It also plays an important role in branding, marketing, and as a symbol of pride for members and participants.
1.1.2.1.1. Full Logo
The user can upload the full logo, which will appear on the website when he searches for or clicks on a club. On this page, the logo at the actual size that the public would see can be seen.
The logo files must be selected within specific dimensions, as shown in the picture, and should be (800 x 400 px).
![]()
To upload the logo:
-
The user can simply drag and drop the image file (SVG, PNG, or JPG) onto the designated box.
-
Or, the user can click on the "Click to Upload" icon, browse for the image file from their system, and then upload it.
![]()
After the User uploads the logo, this is how big it would be for the public when they look at it.
1.1.2.1.2. Abbreviated Logo
There's also an abbreviated logo or an icon logo, which is for areas where the user can see a tiny version of his logo on the screen.

The dimensions of the Abbreviated logo must be 55x55 px.
The uploading process for the abbreviated logo is the same as for the full logo. The user just needs to remember the size and dimensions of the logo.
1.1.2.2. Waiver
Path: Organizations>Edit Organization>Logo and Files
Waivers are managed in this section. The user can upload and organize various types of waivers, such as child waivers, membership waivers, booking waivers for reservations (like court rentals or ball machines), program waivers, and facility waivers.
If the user needs to disable a membership waiver and upload a new version, he can do that easily by clicking the "Disable" button in the Waiver section.
There's no limit on the number of waivers the user can upload, and easily replace existing ones. add
Users can add multiple types of waivers to their organization. To add a new waiver type, the user can simply click on the "Add New Waiver" option.

After clicking the 'Add New Waiver' option, the user will see a window where they need to specify their waiver details, including the Waiver Type and Title, for better clarity.
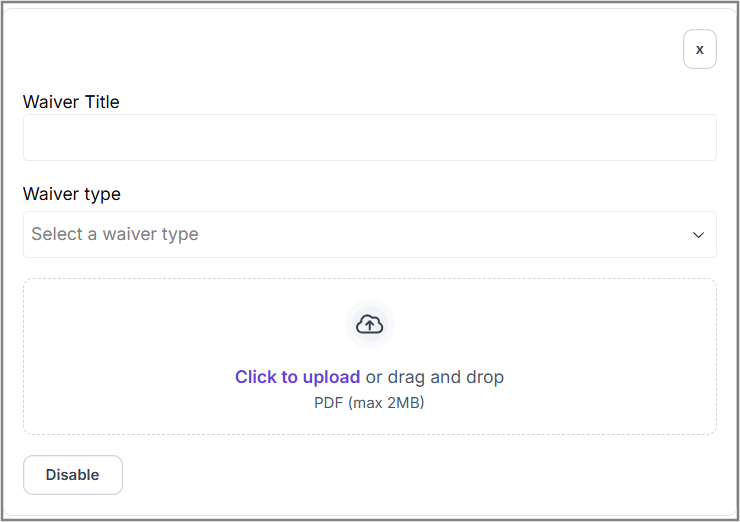
Waiver Title
The User can name the title of his waiver and then select what kind of waiver he is going to associate it with.
Waiver Type
Under this category, the user can see a dropdown list under the name ‘Waiver Type”, where he can find different types of waivers, such as:
- Children
- Membership
- Booking
- Program
- Facility
1. Children
These are those legal documents that parents or guardians sign on behalf of their child before the child participates in a sports activity. These waivers typically release the sports organization from liability in case the child gets injured during the activity.
2. Membership
Membership waivers are legal documents that participants sign when they join a sports club or organization. These waivers typically release the organization from liability in case of injuries or damages that occur during participation.
3. Booking
Booking waivers are legal documents that participants sign when they book a spot in a sports event, class, or activity. These waivers typically release the event organizers from liability in case of injuries or damages that occur during the activity.
4. Program
Program Waivers are those kinds of legal documents that participants sign to acknowledge and accept the risks associated with a particular activity or program.
5. Facility
Facility waivers also hold the same kind of documents that notifies the users to be aware of all the risks involved within the facility.
After selecting the user's choice of type of waiver, the user can upload the files that contain all the relevant terms and conditions for that waiver type.

To upload the files, the user can simply click on the “Click to Upload” button on the screen and browse it from his system files or, he can simply drag the files from his system folder.
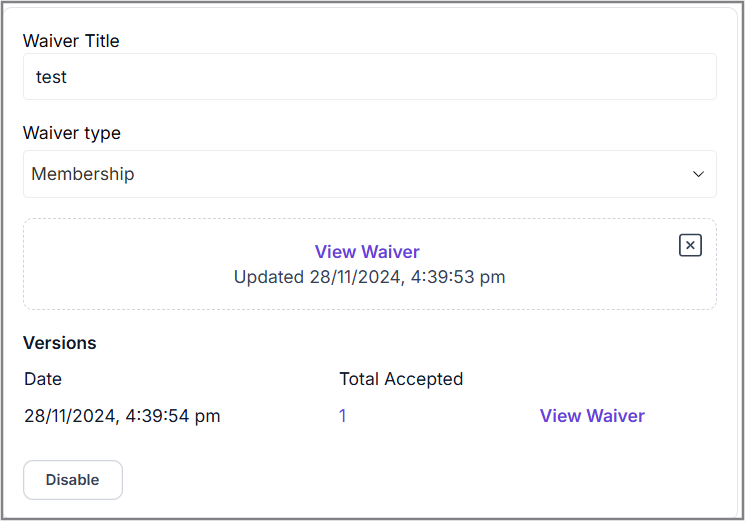
After completing all the details, the user can see that the waiver has been created, with the time and date of uploaded files included. By clicking the 'View Waiver' option, the user can view an overview of their uploaded waiver, and the file will automatically download to their system.